Intro
I built this raised garden bed using upcycled tongue and groove siding, notched 4×4 legs, and a simple shade cover made from scrap 1x and a leftover screen. The bed sits on pavers for leveling and moisture control. Below is a rough cut list, soil recipe, and an easy assembly sequence so you can copy the build this weekend.
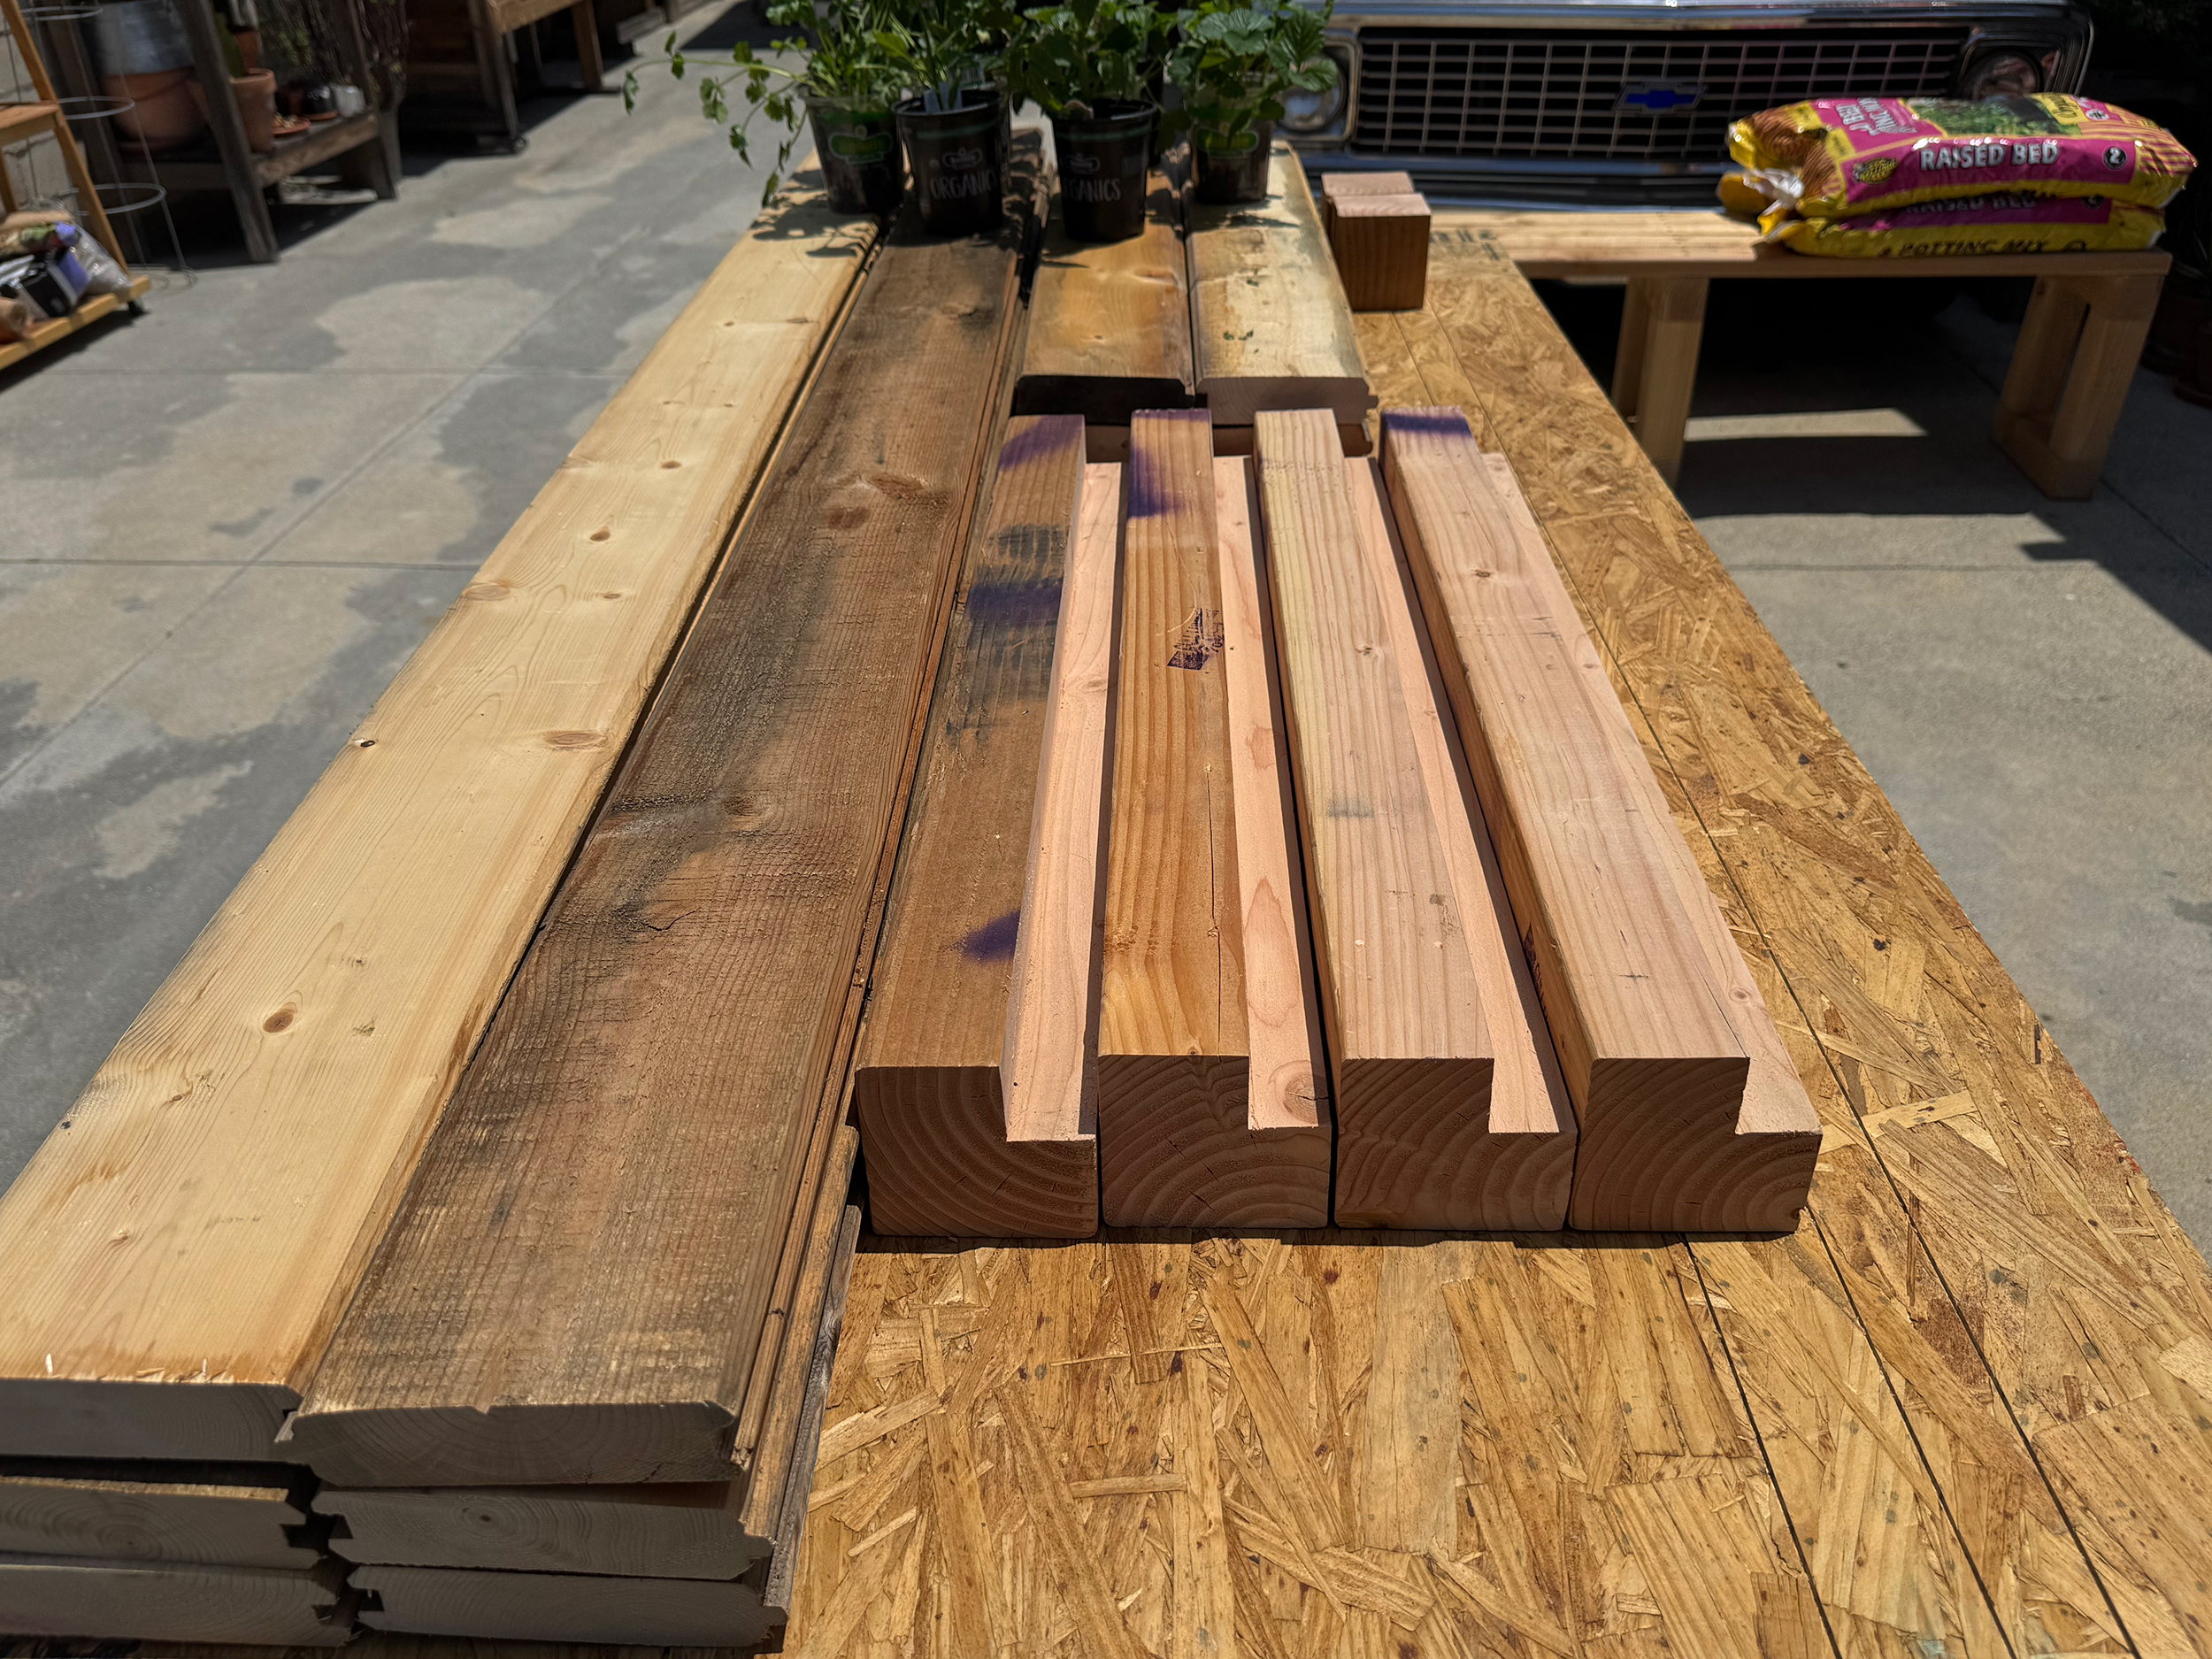
Cut List
Adjust lengths to your preferred sizing
- 4×4 legs 4 pieces, cut to bed height + trim clearance
- Side panels tongue-and-groove boards cut to long and short sides
- Corner cleats/rails 1×’s material to tie panels to the frame
- Top trim ripped tongue-and-groove with the profile trimmed off for a flat cap
- Shade cover frame 1×2 and 1×3 rails, two roof pitches, and center brace
MATERIALS
Upcycled tongue-and-groove boards for the sides and top trim, 4×4 posts for legs, 1×2 and 1×3 for shade-cover frame, Window screen or shade cloth, 2½″ exterior screws, 1¼″ exterior screws, Landscaping fabric for liner, Pavers for footings and leveling
Assembly Steps
Layout and pavers
Dry fit the footprint on level ground. Set four pavers under each leg location for stability and moisture break. Check for square.
Notch the legs
Mark your panel height on the 4×4s, then notch to accept the side panels. A circular saw with multiple kerfs and a clean-up chisel works fast. Test fit.
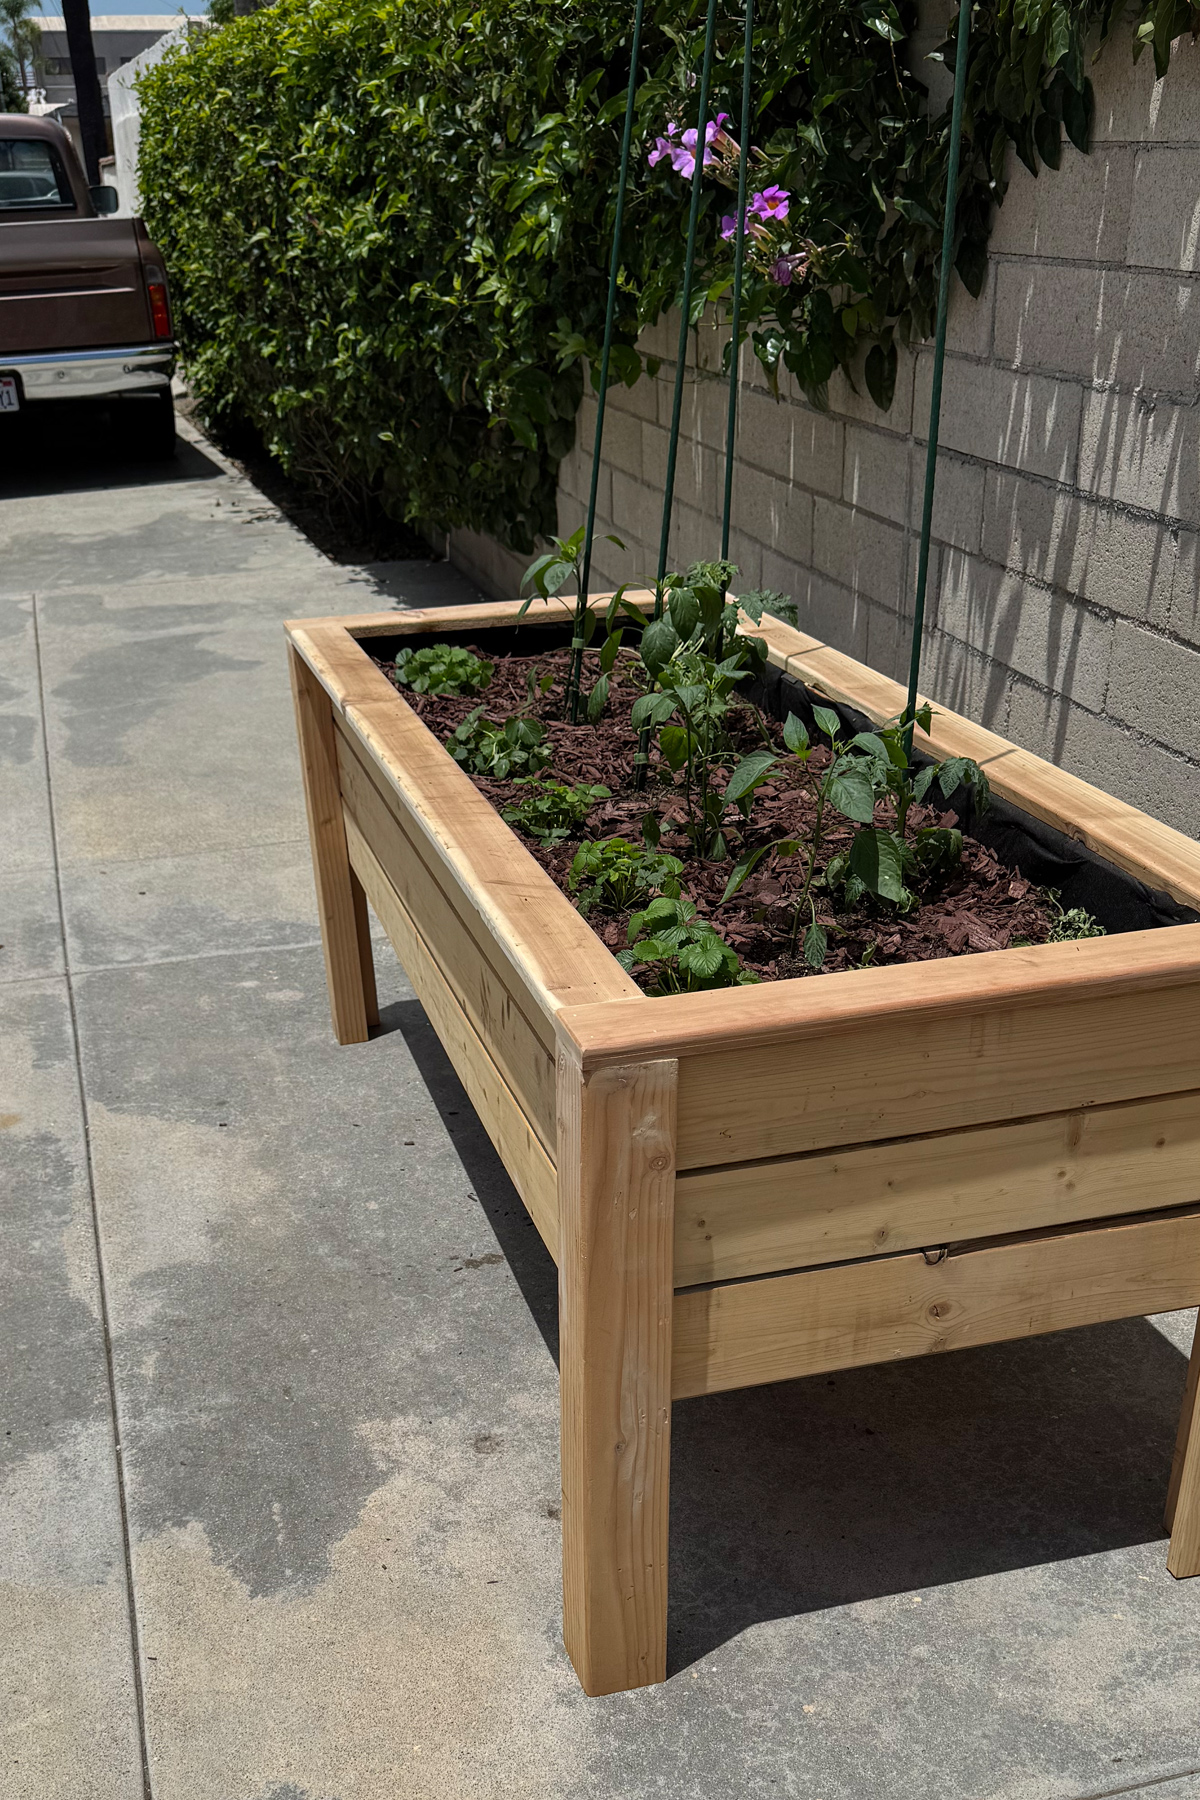
Build side panels
Pocket-screw or screw through 1× cleats on the inside to tie the tongue-and-groove boards together. Keep edges flush and square.
Attach panels to legs
Stand up the long side, fasten to legs. Add the opposite long side, then the two short sides. Re-check square and level on the pavers.
Add bottom rails and liner
Install interior rails near the bottom to support the liner. Staple in geotextile fabric and add a few drain holes near corners.
Top trim
Rip the tongue-and-groove profile off your trim pieces so the cap sits flat. Miter corners, pre-drill, and fasten.
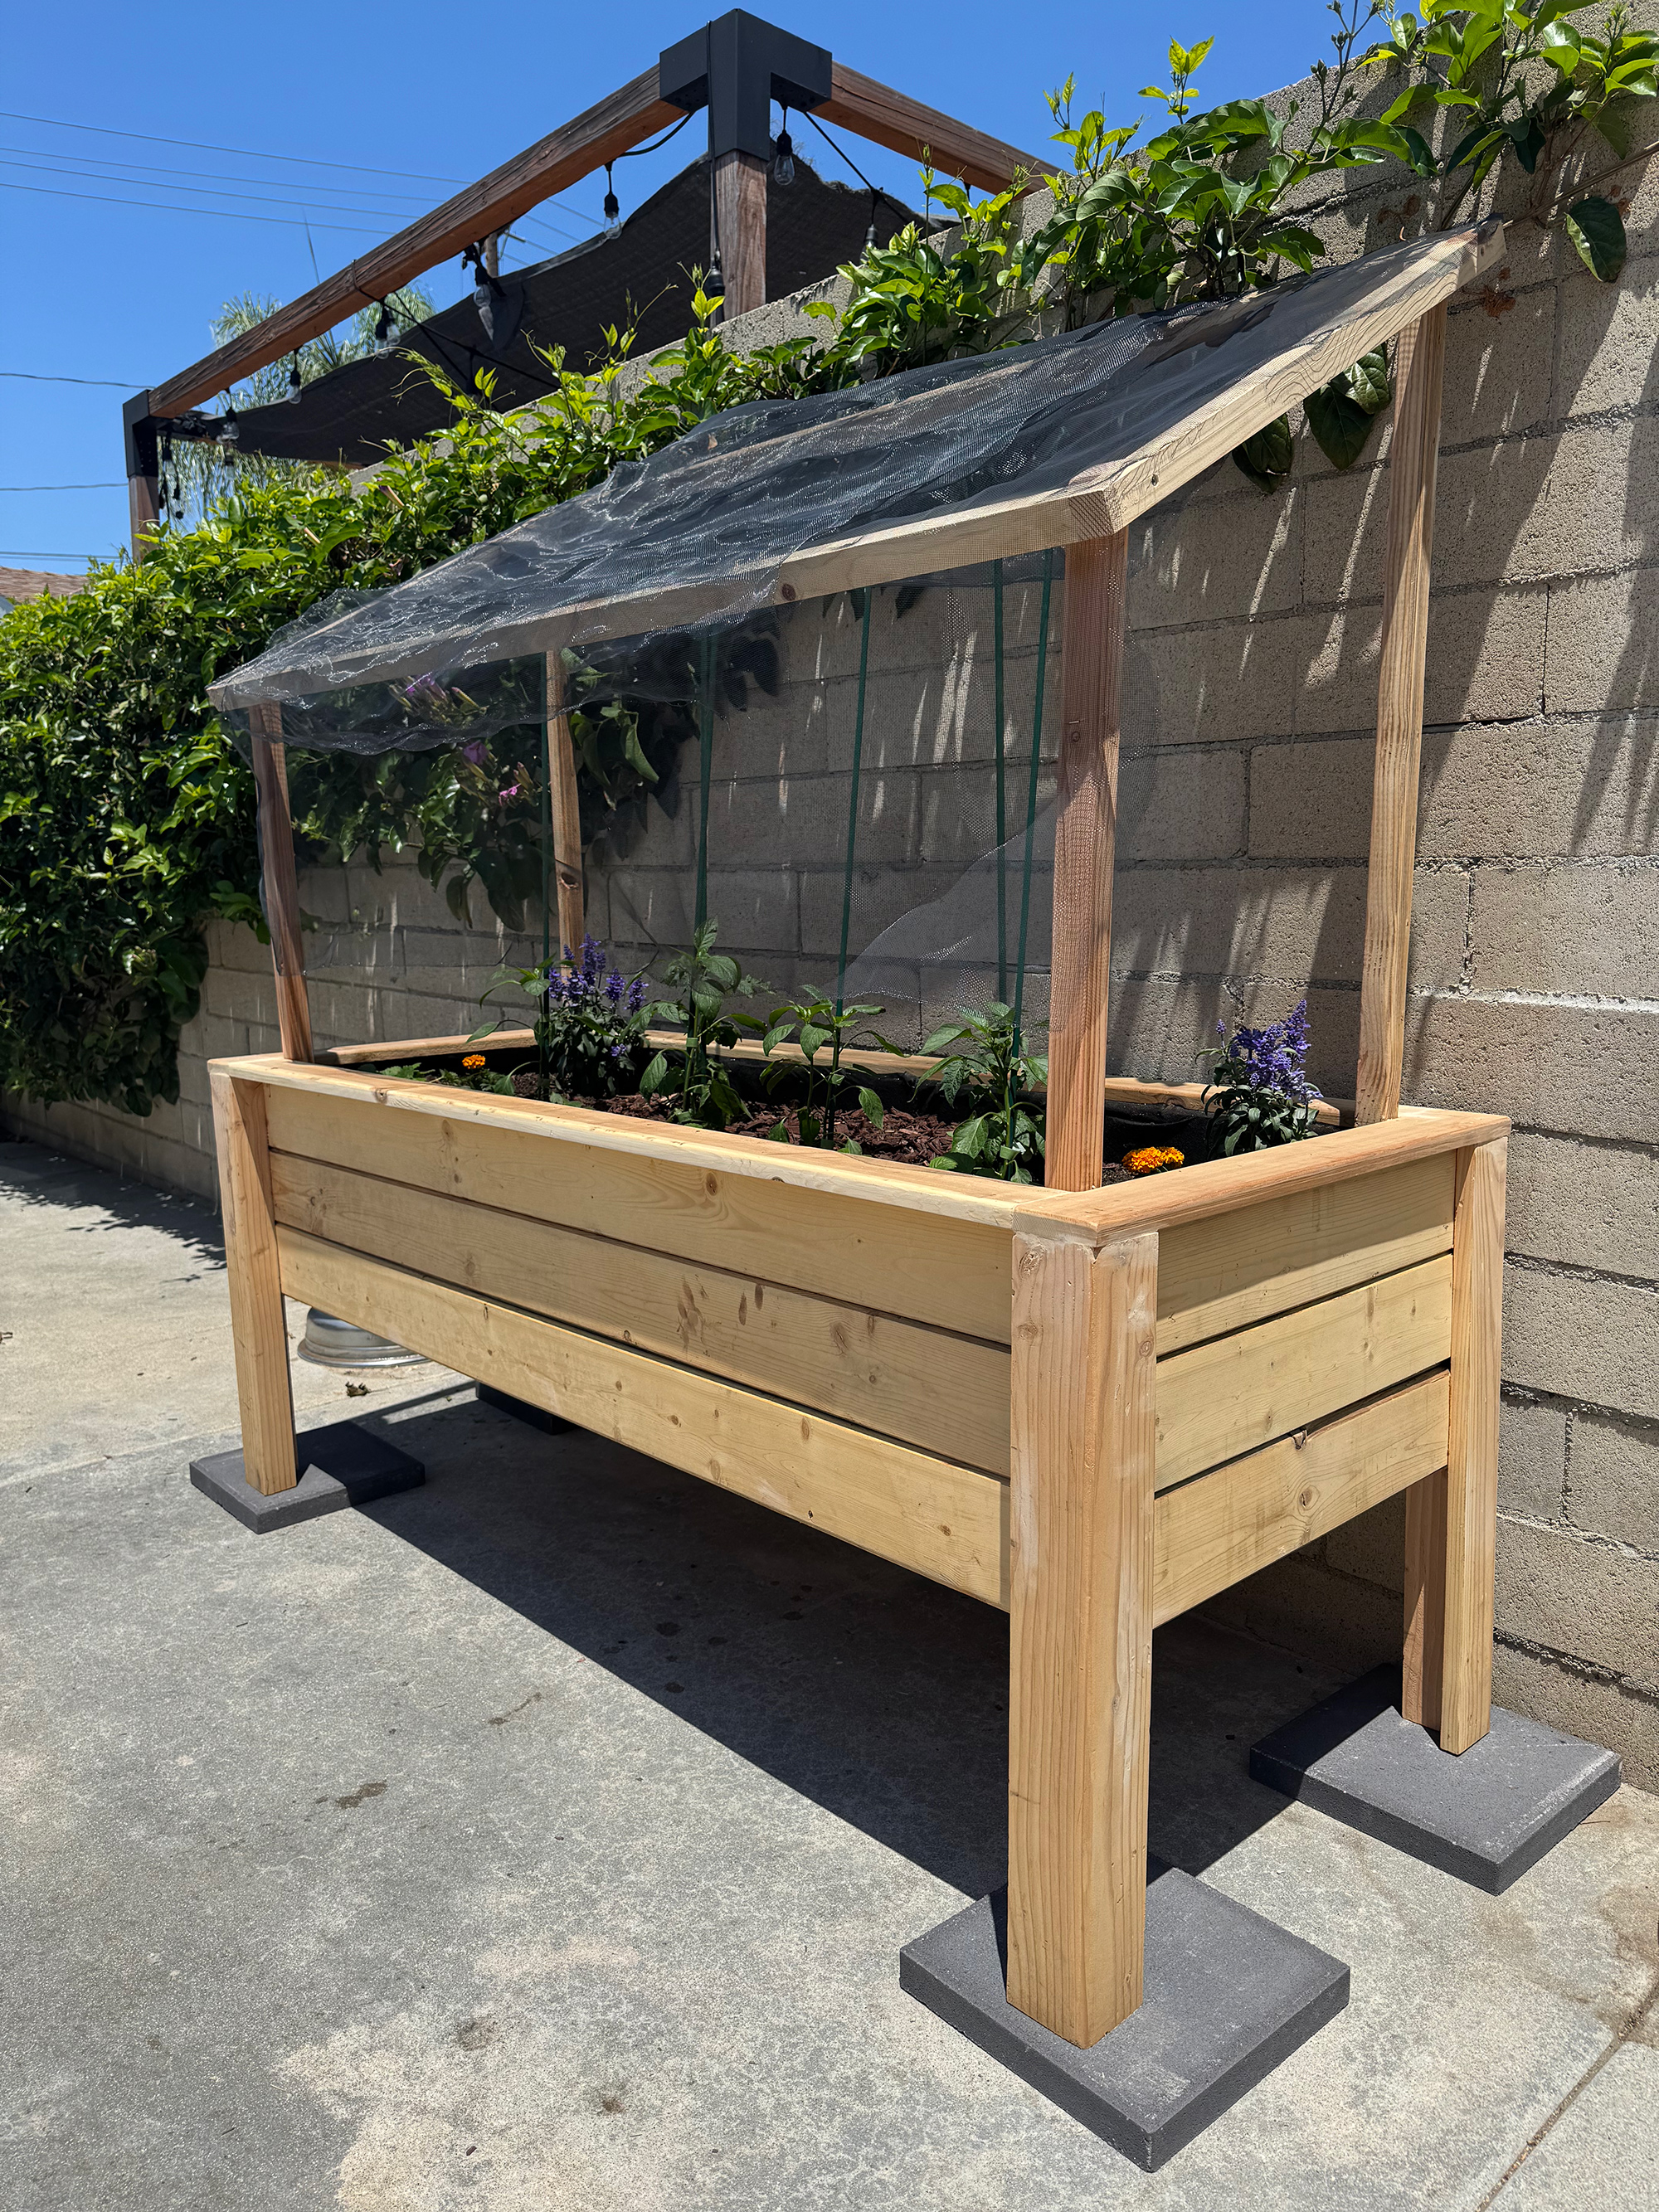
Shade cover
Build a lightweight frame with 1×2/1×3. Stretch screen or shade cloth and staple. Drop it into sockets so it lifts off for planting and harvest.
Finish
Seal with an exterior-safe oil or sealer. Let cure before filling.